
To attach a brooch pin to the back of a flower:
You need a needle, thread and a brooch pin (available in bead and habby shops).
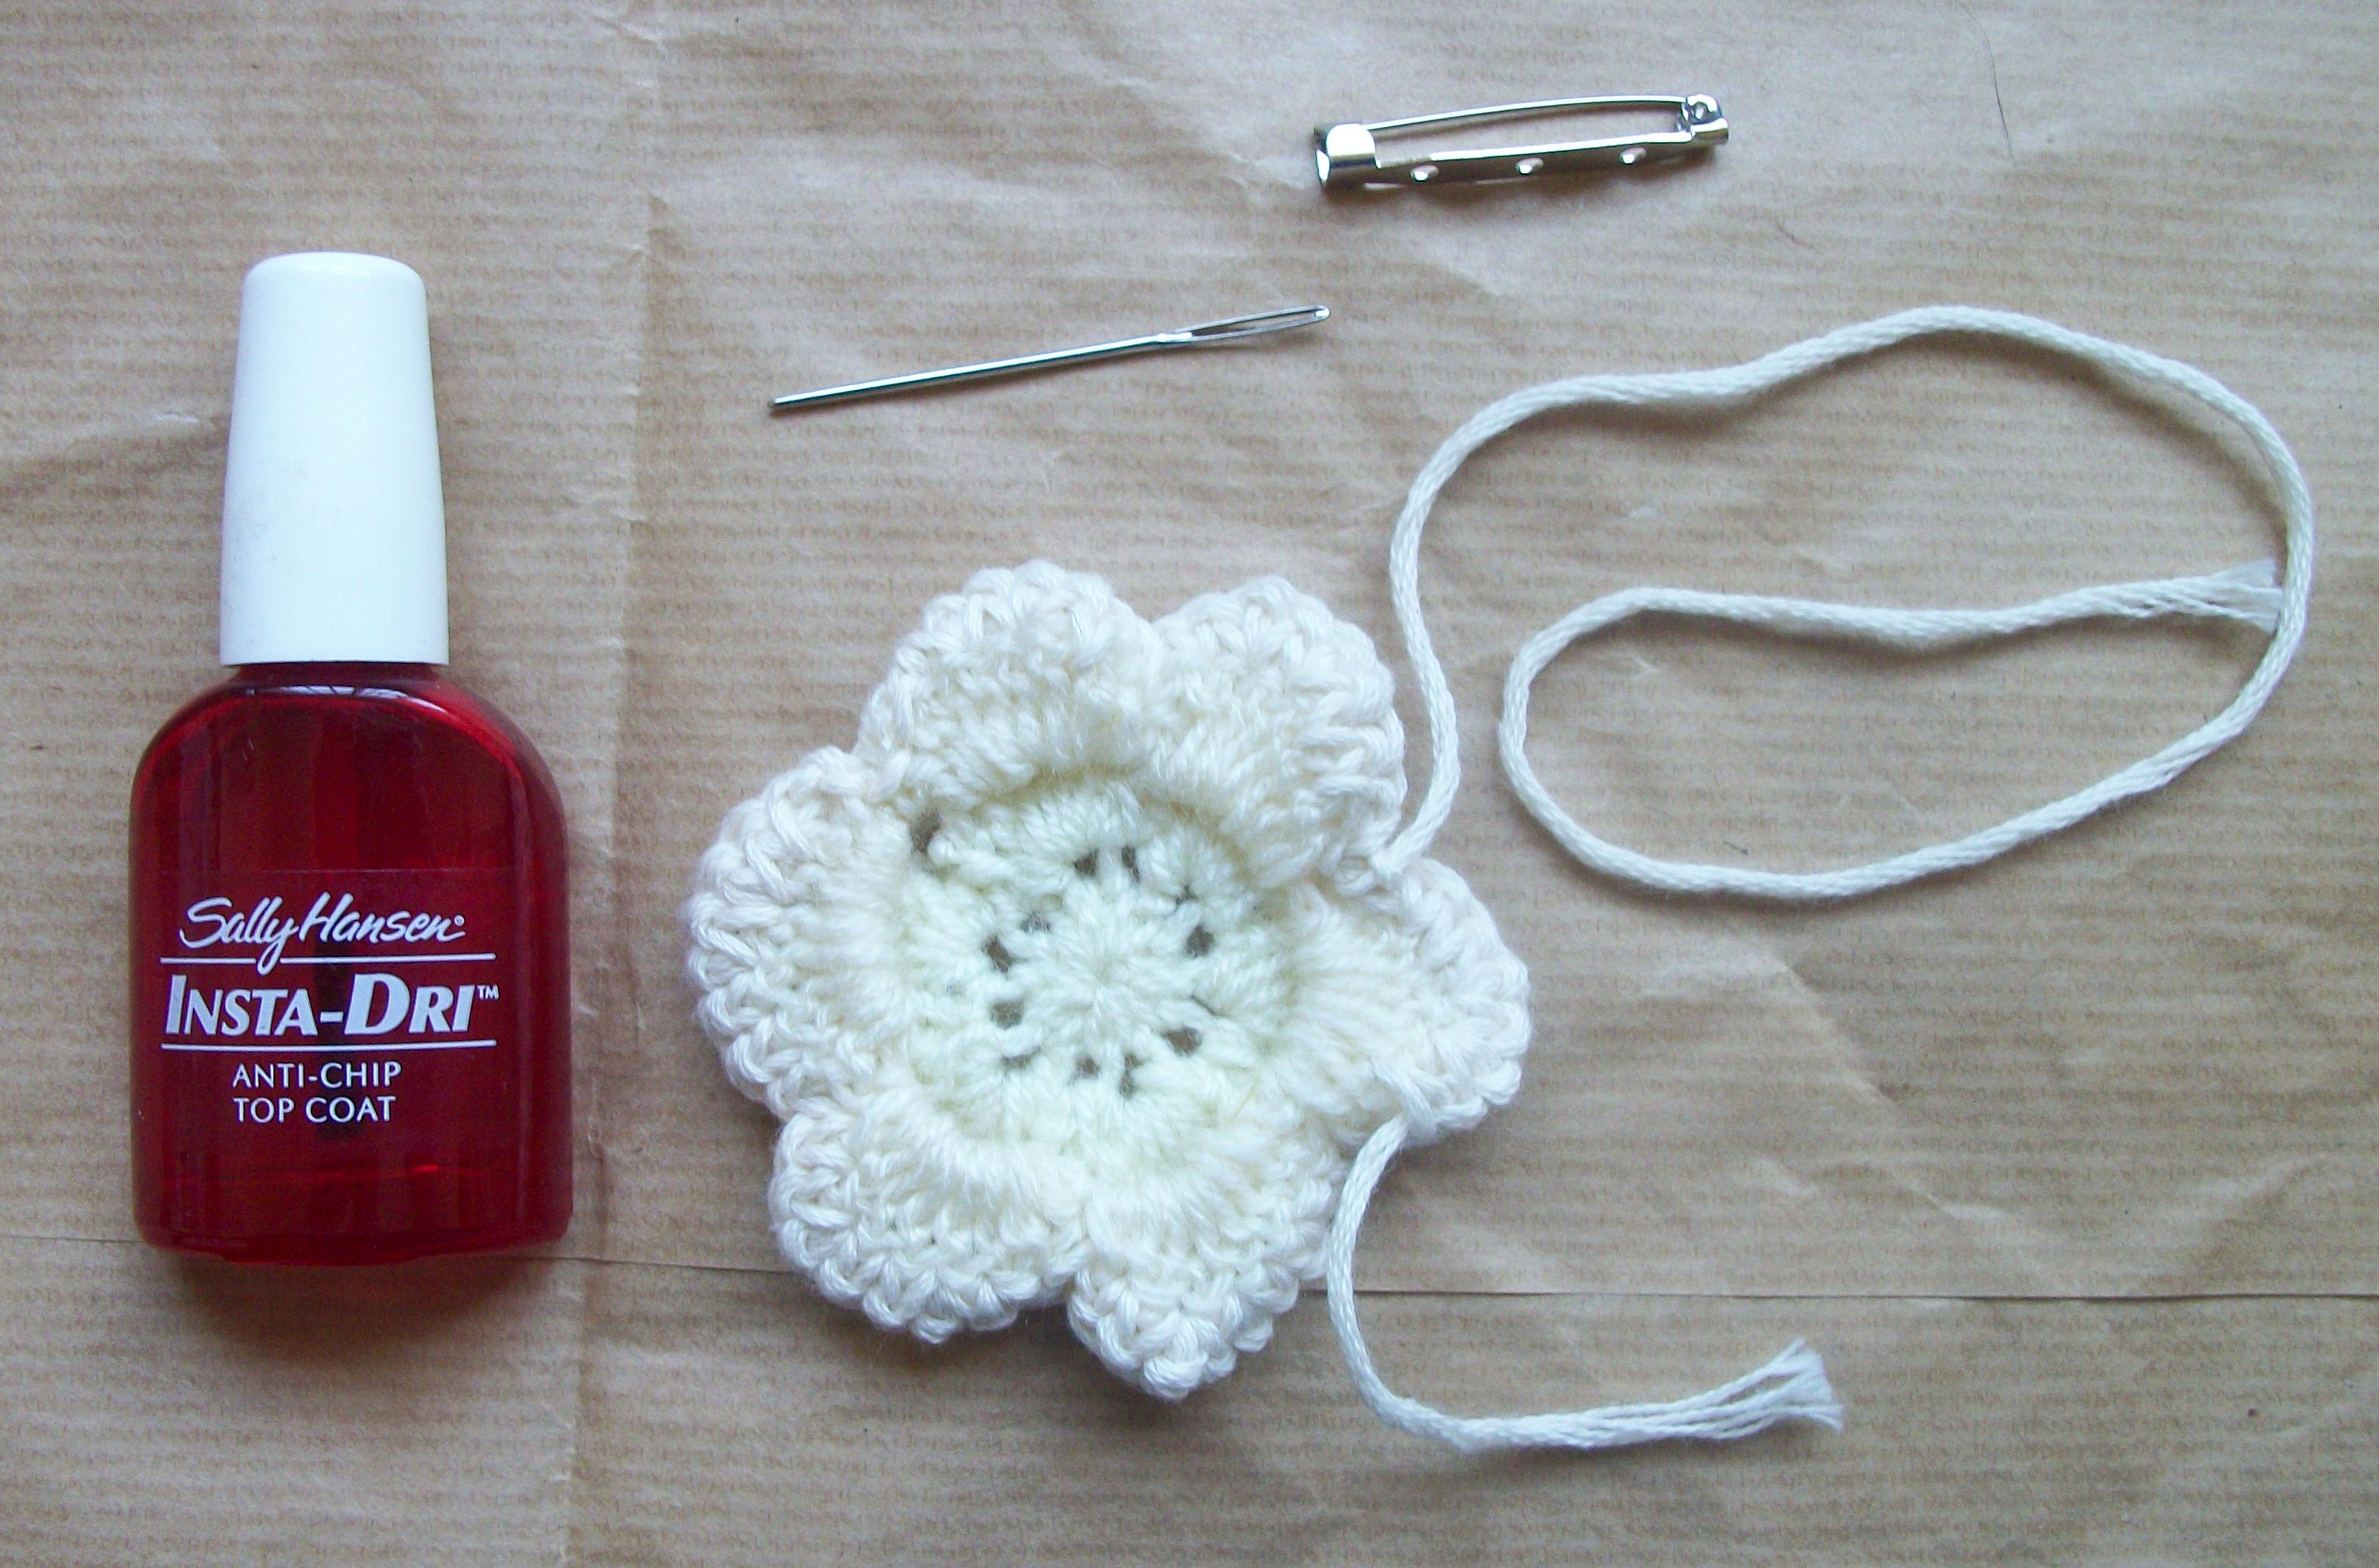
Leaving one long end free, weave all the other ends of the yarn neatly into the back of the flower and snip off.


Thread the needle with the long end of yarn and run it under a few stitches towards the centre of the flower, where you want the pin to be.
If your flower doesn’t have a loose long end that you can use to attach the pin, cut a length of yarn in a similar colour and use that instead. Start by working a few stitches into the back to anchor the yarn.

Open the brooch pin, hold it in the position you want, and stitch through each of the three holes in the bar. Be careful not to stab yourself. I do this frequently.


Stitch through the other side of the bar as well, then weave in the loose thread. Snip off all loose ends.

I like to dab on a bit of clear nail polish or a tiny bit of fray-check or craft glue, just for safety’s sake.
And, as they say in France, walla!

A very simple yet effective idea. Thanks for sharing.
And a good reminder of my To Do List for 2014, picking up crocheting again. It looks really lovely
great idea!
Pretty!
Have just picked up my crochet hook again and now have to re-learn everything AGAIN but have started a baby bootie (for no particular reason other than they are cute) so wish me luck!
It looks very pretty but I thought you were going to show us some lovely red painted nails too!
That’s very professional. Normally just a safety pin here ;)
Flower broaches are very popular here! Great idea! The pin makes it look more complete and makes a great gift or sale item. :-)
Thanks for the nail varnish tip- will definitely be trying that one. x
I use it when I sew on buttons as well, just a dot on the front keeps them from ever coming loose and falling off
Very nice. I stab myself too when I sew the pin backs on. Hugs, Tamara
Thanks for the nail varnish tip. I’ve not made brooches yet but now feel they may be looming in my future makes!!! Happy new year. Emma
Love it! We need posts like this to remind us (and when I say “we” and “us”, I obviously mean “me”) that these great & pretty things are not at all intimidating…unless of course, you just made it look so easy. Damn!
Great tip to use the clear nail polish for the ends! Xx
Thanks for the tutorial.
Voilà (vois là meaning see there) is the right word in French.
Oui, je sais :-)
Many thanks for sharing, this is going to be my next project, and this is the best tutorial I’ve found :-)
You’re most welcome :D